
 I decided to do something a little different for Tablescape Thursday. First a big thank you to Susan at Between Naps on the Porch for hosting this fun weekly event!
This is very simple and has a great impact. Truth be told, I threw this together in 5 minutes. It is very easy and you can use whatever you have available.
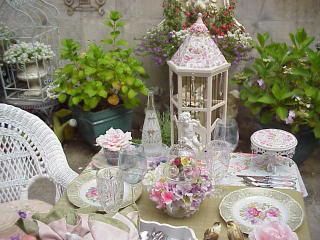
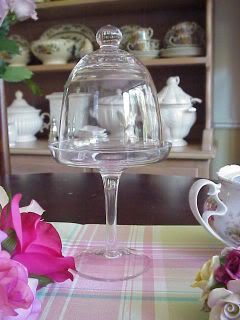
Here are a couple of photos of the original that I used in my tablescape...
First, gather the items you will need.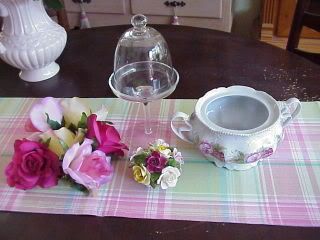
The vintage Adderley Rose Posy (you can put anything under the glass as long as it will fit and doesn't look smushed!)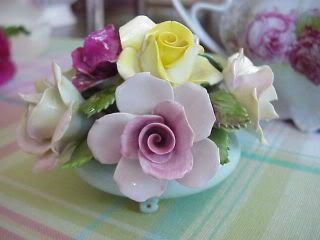
For this project, I'm using faux roses.
I almost forgot, I use tissue to give the dessert pedestal a level surface inside the container. It's easy to adjust. You can also use styrofoam if you need to raise the pedestal a bit.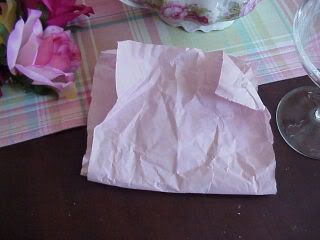
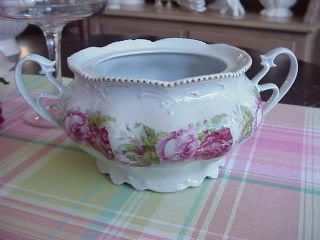
Insert the pedestal into the base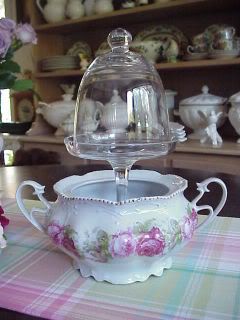
Place the posy onto the pedestal, make sure it is secure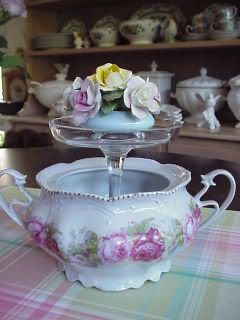
Arrange the flowers all around the the top of the container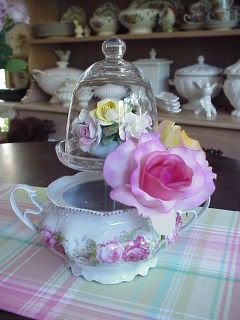
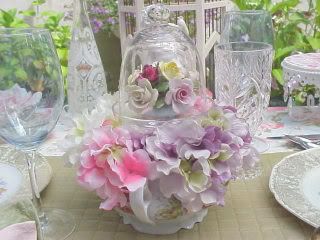
Voila! Your centerpiece is done!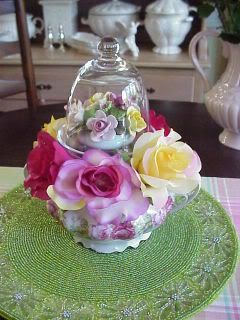
Birdseye view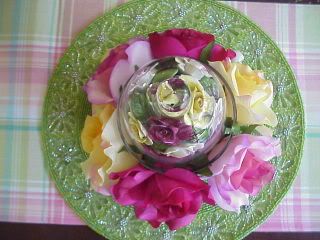
Simple and Sweet!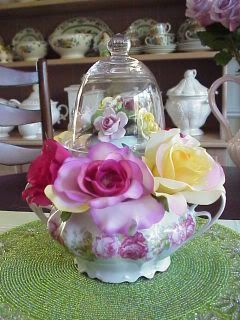
You are only limited by what will fit between the base and the pedestal. You can use faux or live flowers, vegetables, greenery, or fabric.
If you have any questions or have suggestions, please feel free to leave a comment to share.
Thank you to Susan of Between Naps on The Porch for hosting this fun weekly event! She's the best!
I'll be around to see all the beautiful tablescapes posted by the talented and clever participants! You can too..just click here!
43 comments:
Hi Tina, I am not a member of Tablescape, but just wanted to come in and say how sweet and beautiful your idea and table are. I am a floral designer by trade and that is just adorable. I love the container you used......very nice my blogger friend, Char
That's beautiful, honey! I love making little things like that. AND thank you for the tutorial....
xoxo,
Connie
LOVELY, THIS WAS REALLY CREATIVE - THANKS....
Tina, you are so clever. That is a great idea and yours is very lovely!
What a beautiful centerpiece! Thanks for sharing that wonderful idea!
All the best,
Eileen
Hi Tina, I love the center piece. I will be trying this. Your blog is wonderful. Have a great day Julie
Many thanks, Tina, for this lovely tip. I have a lot of trouble with centerpieces...either too high and people can't see around it..too "just like everyone elses"...no imagination, I guess.
Enjoyed your post.
Hi Tina! thanks for the tutorial :0)
Very nice...
so pretty, thank you for sharing~
This is so sweet and adorable! I'm going to stay awhile and poke around ... good stuff here.
Jane
I love that idea for a centerpiece. I love how it is not too high. I will have to try and remember that idea for sure.
Beautiful centerpiece--I love the pretty, feminine colors and floral patterns!
Tina...this is an amazing idea! What a GREAT POST! Thank you sooo much for sharing your special tricks...
Simply wonderful!
Rebecca
WHAT A BEAUTIFUL BLOG - SO, SO PRETTY.
YOU COULD DO PINK SATURDAY EVERY DAY!
GLAD I LOOKED IN
JJ
Your table is gorgeous and your centerpiece is Amazing!!! Very clever and a great tutorial!!!!
♥ Teresa
Vert charming and feminine - lovely!
What a great centerpiece and thanks for sharing the "how tos" --
Love this idea and it is soooo pretty...btw, I enjoyed your instructions, so detailed, down to the smushed!!! I can totally relate!
Tina that is so lovely, I used that little pedestal with the dome for a stack of cookies for a bedside table I styled for my website! It is so adorable! At the time I returned it but now I wish I'd kept it!!
Thank you for sharing this post. You're right, it is fairly easy to make and yet so beautiful. Your tablescape is gorgeous.
This is so pretty - thanks for sharing your secret! I'll bet this will be showing up on lots of tablescapes soon!
Tina, this is such an ingenious idea! Thank you for sharing it; I can see the possible combinations are endless.
My first time to your blog, and I LOVE it! Thank you for the inspiration. :)
Hi Tina,
Really lovely centerpiece! Love your ideas! Thanks for sharing and have a wonderful day.
Blessings,
Sandi
Girl, you are talented and imaginative. I hope none of us gets hurt givin' the birds eye views. ;-) But, it is usually my fav shot. xox! Thanks for sharing.
Great centerpiece & thanks for sharing the "how to" on making it. I just love getting inspiration & ideas from others. That is the best part of blogging. And Thanks for visiting my tablescape & leaving me a comment. It really means a lot to me.
And it's so very pretty! And looks like your mosaics somehow!
Brenda
The centerpiece is charming; I love that you can do it with what you have on hand, no trip to the florist or garden needed. Very pretty, and nice clear instructions... thanks!
Cass
This is just simply beautiful and feminine...bravo!
Hi Tina, You are one very talented lady! I would have never thought to do this,it's so simple yet so fabulous! i think I'm going to give this a whirl myslf sometime!:O)
Beautiful! Thanks for sharing the centerpiece idea. Very nice.
You centerpiece is so clever! Thank you for sharing you idea in the step by step photos. This so helpful. If, I didn't leave a comment on your tablescape before, I am telling you now it is beautiful and so imaginative. Thanks for your help in making the centerpiece.
Well isn't that just the most clever thing I've seen today. Darling! Thanks for sharing. I will be using the idea in the future. You blog is darling!
~Liz
Oh my! How creative! At first I thought the cloche was just perched on top of the flowers and I was afraid it would fall! Great that the base is inside with the flowers! It looks soooo pretty! I must try this!
You'll have to share this on Marty's Cloche Party in September. She'll love it! She is on a trip, so if she didn't comment, that's why!
Love it! Thanks for sharing the instructions!
Katherine
That is beautiful! I will try it while I have an abundance of hydrangea in bloom!
Thank you, and thanks for the visit!
Your table is lovely...and I really love the centerpiece. Thanks for the tutorial...
Jane (Artfully Graced)
Hi Tina...
Just read the sweet note that you left on my Rose Faerie tablescape...thank you so much for coming by and for leaving me such a sweet comment!
My friend, I just adore this piece that you used for a table centerpiece...and the tutorial was great! I just love the frenchy white bowl that you used...it's gorgeous!!! Girl, I just would have never thought of doing this...thank you so much for the idea...it's really beautiful! And...I think I have all the stuff I need to make one! By the way...love that beautiful tablescpae in the first photo...soooo beautiful!
Warmest wishes,
Chari
WOW!!! It's absolutely stunning!!!!!
PS.. I love your blog, this is my first visit :)
So clever! Thanks for sharing such a great idea ... I'll definitely try my hand at something similar. Imitation's the sincerest form of flattery, right? I'll venture to day you'll be flattered a lot in coming weeks! ;)
Bill @ Affordable Accoutrements
that was beautiful. Who would have thought of putting it inside something else.
Tina, all is perfect! I love them!
xoxo
What a great, easy way to make a beautiful centerpiece!
Thanks for sharing!
Blessings,
Lisa
Good idea as I like simple and sweet:)
Joyce
what an absolutely gorgeous blog you have! i love the squirrel on the birdhouse picture, & the swan painting from your sister, & I AM absolutely enchanted with the mosaic projects!! where do you find all that lovely china...you've inspired me, im on a mosaic mission :) Happy {late} Pink Saturday!
kind wishes
Post a Comment