Thursday, February 25, 2010

PINK SATURDAY ~ INSPIRATION FOR SPRING

Happy Pink Saturday everyone! Thank you so much to our fabulous Beverly of How Sweet the Sound for hosting! I hope she is recovery well and be back in the "pink" in no time!

Is everyone as anxious for spring as I am? ha! Here is what really got me going.

I received my Early Spring 2010, MacKenzie-Childs catalog. Be warned, these photos don't show how really pretty the colors are on the catalog! If you received your catalog, you know exactly what I mean.


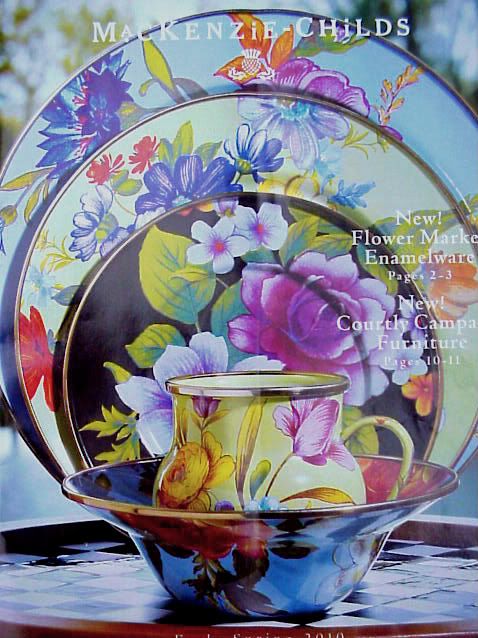
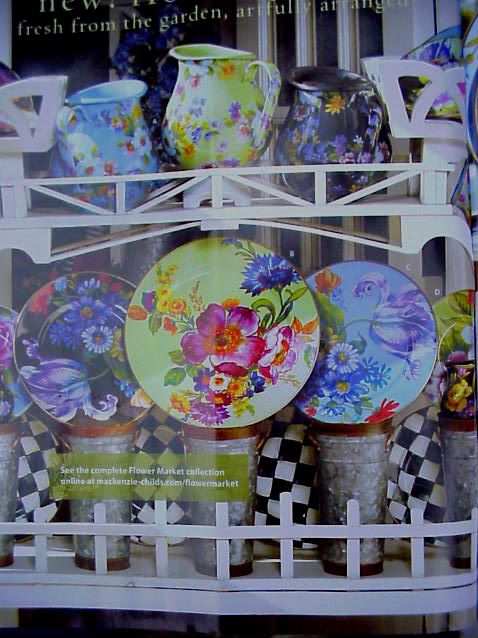
These are aptly named Flower Market Enamelware. Me so likey! You can view them on the MacKenize-Childs webpage here

Anywhooo, when I was at Michaels, they were having this great sale on their containers and vases. I've been eyeballing this tall one for some time.


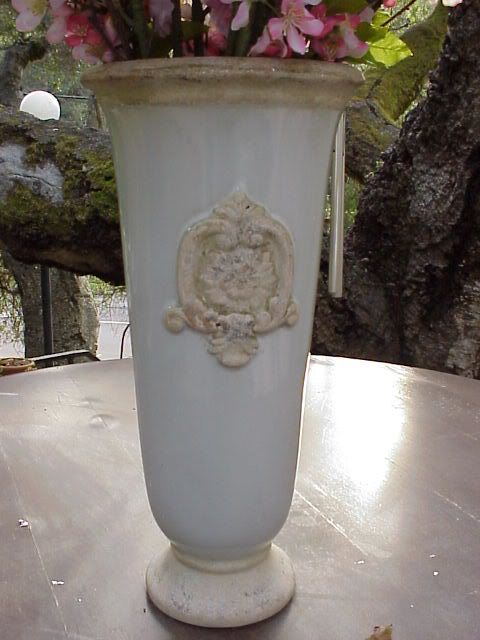
I adore the soft blue color. Well, it was marked down from $29.99 to $11.99, so...totally sold! ha!

The Mac's new line completely inspired me, and not wanting to wait weeks to act, I dug out my stash of faux babies and....


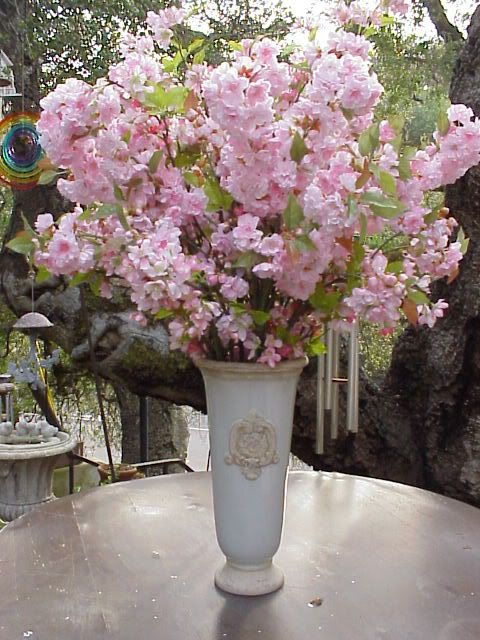
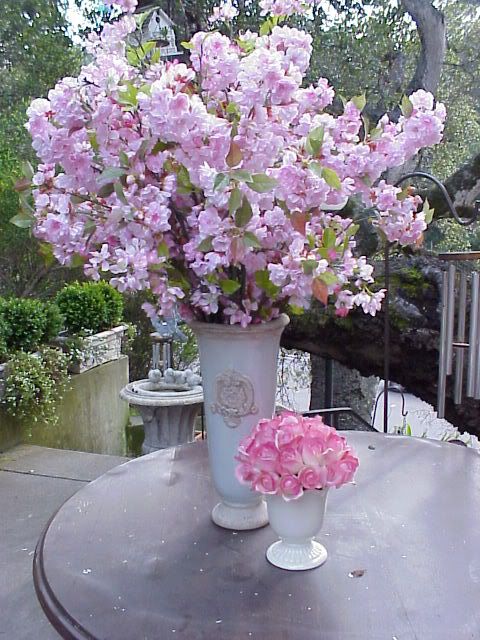
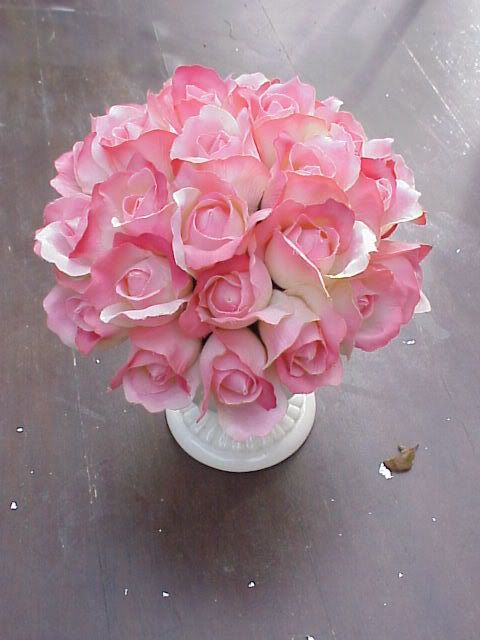
If you gonna go faux, go big! ha! I love this bunch of cherry blossom branches, so cheery! I brought out my little pink roses to give you an idea of scale....


I had to take the photos outside; inside was just too dark....

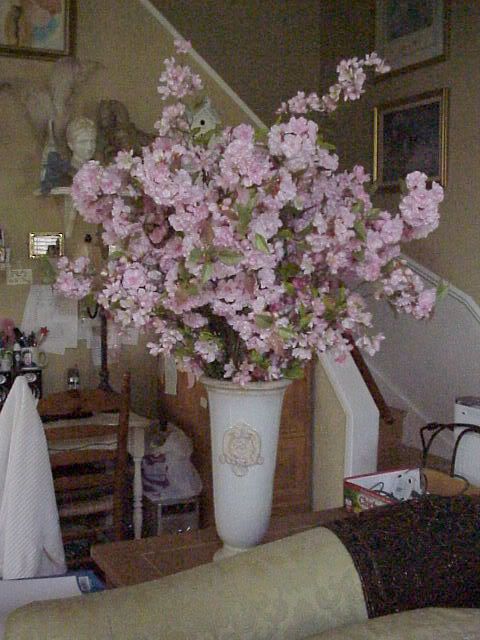
Please don't mind the "spring cleaning" mess! I was moving it around and around trying to find a bright spot for the photo. The one shown is the brightest as it faces the slider, but was still to dark. Perhaps one day I'll afford a better camera! ha!

I love my little white vase filled with pink rose buds (yes, faux too). It hangs out on my bed side table. One day when the light is better, I'll show a photo of that vignette.


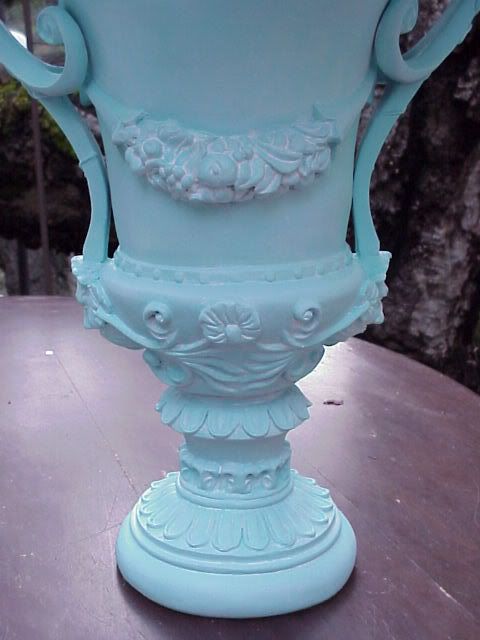
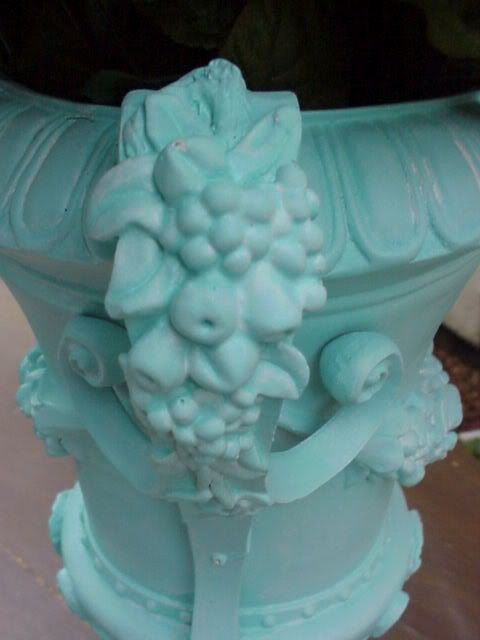
I ran out of time on this next one. I only just finished giving this urn my shabby aqua treatment, and, I wanted to share it with you....


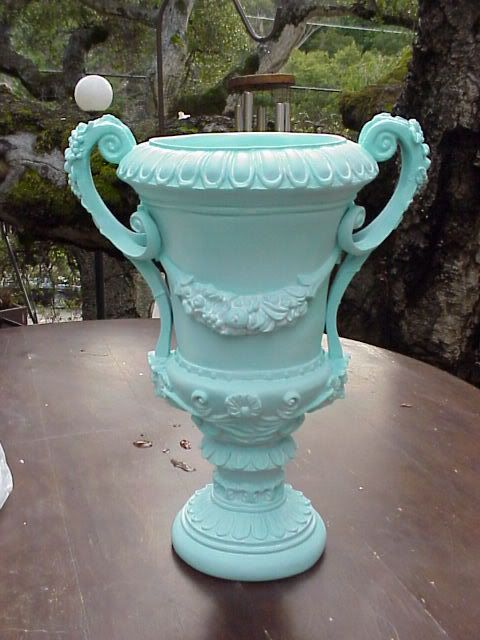
I am crazy for this urn! It was that ugly brownish color that really didn't show any of the detal.

UPDATE: Sorry, no before photos; yes I know me bad blogger ! This treatment was simple and you can find the detailed tutorial at my How To's here.


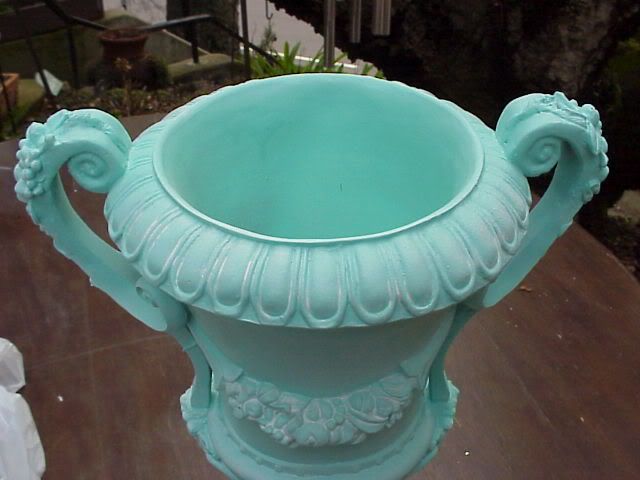
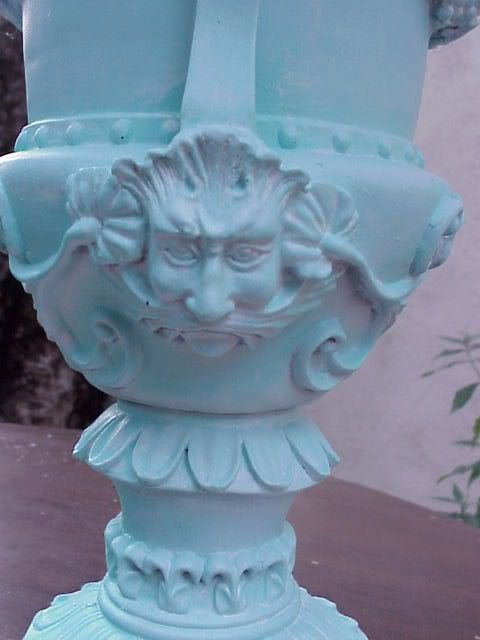
Love that face! Great detail...yes?!

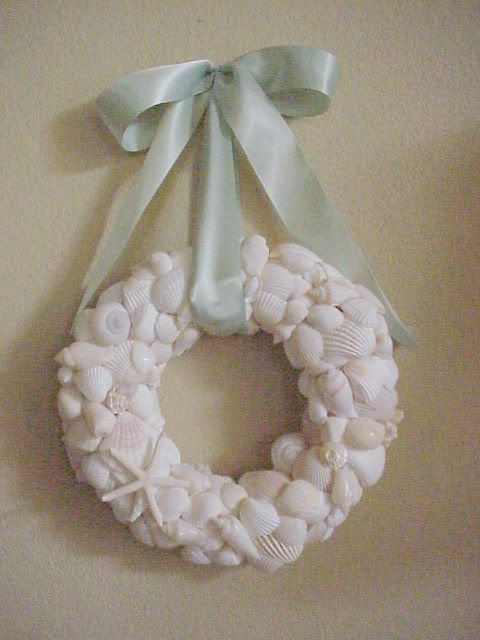
I am going to fill it with these....


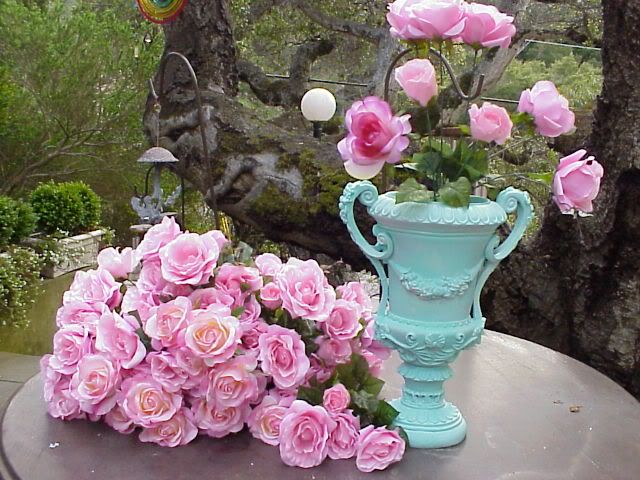
Like I said, if you gonna go faux...go BIG! I promise to show you the finish next Pink Saturday!

Before I go, part of our quest for Pink Saturday is to introduce you to another blogger friend. I'm sure many of you know her.

She is lovely, clever and talented! She just whippped together this charming piece....


courtesy of A Petite Cottage

You can see her post here

Ana grabbed my blogger button and found I (in my typical fashion) didn't proof it close enough before publishing it. I had errors in the coding and *blush* typos! She took the time to email me and let me know about my faux pas. *Mauhhhh* Ana! Thanks so much!

Be sure to stop by and say hello to Ana at A Petite Cottage

I'm off to visit other fabulous pink participants and see their beautiful post for Beverly's Pink Saturday! Thanks so much for spending some time with me!

Cheers!

Sunday, February 21, 2010

THE SHELL GAME ~ WHITE BEACHY COTTAGE WREATH

I'm still playing with seashells! I'm sure you remember this whimsical seashell decorative tassel....


And this seashell photo frame....

seashells wreath tassel


Both the tassel and photo frame are available here at my Etsy

In keeping with the beachy cottage theme, I gathered together some of these


Wrapped some ribbon around the base


Cover the sides and top with seashells. For this project, I want a very random, free flowing result.


Added some pretty double satin aqua ribbon


Quick peek at the finished back...


Added the bow and voila!

wreath aqua seashell


For this project I used:

8" Green styrofoam wreath base
1" Grossgrain Ribbon ~ Cream
Low temperature glue stick
Seashells varying from 0.75" to 2"
Starfish focal 2.5" x 2.5"
My wreath hanger is a 1.5" satin ribbon in soft aqua

You can find the complete tutorial over at my "How To's" here.

Oh! I almost forgot! I (finally) made my blog button! No fancy bells and whistles, just ummm.....cute as a "button"! ha!


You can grab it and add it to your blog page if you'd like! The code is located near the top of my left margin!

Thanks so much for visiting me! Let me know you were here and I'll make sure I pop over to your page for a visit! ;)

I'm linking this with these fabulous hosts!

Susan @ Between Naps On The Porch ~ 58th Metamorphosis Monday

Kim @ Twice Remembered ~ Make Your Monday Week 14

The DIY Show Off ~ DIY Show Off Monday

Gina @ The Shabby Chic Cottage ~ Transformation Thursday

Cindy @ My Romantic Home ~ Show and Tell Friday

Saturday, February 13, 2010

PINK SATURDAY ~ 17 DAYS OF GLORY

Happy Pink Saturday everyone! Thank you so much to our fabulous Beverly of How Sweet the Sound for hosting!

Such a busy weekend! It's Valentine's Day weekend and the beginning of the Winter Olympics, hosted by Vancouver, BC, Canada. If you have never been to Vancouver, you should go. It is beautiful. Reminds me much of SF, with it's many stucco homes and hills. Even has the easy going flavor similar to SF.

I thought this collage I created shows how well the two occasions compliment one another.


Wishing each and everyone a very safe and happy Valentine's Day!


Ok, I'm going to scoot. I want to view the other fabulous participants and their post for Beverly's Pink Saturday! You are more than welcome to join us!

Enjoy the Winter Olympics!

Cheers!

Wednesday, February 10, 2010

DESIGN, REMODEL, REDECORATE YOUR HOME ~ HOME DESIGN SOFTWARE ~ MY FLOOR PLAN

I can tell you first hand, going from nearly 3900 sq.ft. to 1325 sq.ft is not an easy task. So what does one do when forced with such a dilemma? I felt it best to find a tool that would help me figure out how to optimize furniture layout and storage, without having to move everything around.

After some research, I decided perhaps home design software would be the answer. I played around with the Sims game back in the day. Mostly so I could build and furnish the homes, shops, restaurants, etc. I jumped on Google and started reading reviews on the various software available.

I was hoping to find one more suited for the average, non-architect, non-computer geek, like me.

I narrowed it down to this one because of the following...

Wow, "Make Your Decorating Ideas Come To Life!" That image looks fabulous, yes!? Well, it gets better. Next, they hit me with this...


As great as it all looks, I'm still a bit skeptical. So00000 they hit me with this image...

The three magic words I needed to see "Powerful, Fun, EASY"!

Did you notice who is at the computer making decorating magic....a kid. Yep, a kid! Well slap me silly, if the little guy can do it...how hard can it be?! (At this point someone should have really slapped me! ha! )

Like all savvy frugalistas, I searched online for the best (cheapest) price. Three days and $50.00 later it arrived. I was as giddy as a drunken goose! I jump on my computer and loaded the program. I couldn't wait to get started! I could arrange my place...then I could build my dream home! I could design the floor plan and decorate it the way I always imagined it to be!

After nearly an hour watching videos tutorials and reading helpful hints, I decided it best I just get started. After all, I've done a sufficient review and feel I have a clear sense of the basics. The rest, I can learn by trial and error, right!?

David Bromstad was so right when he said, "you can't fix stupid!"

About 5 minutes into it I realize I need measurements. I jump up, grab my notepad, 16' tape measure, a pencil and measure out each room. Back at the computer, measurements in hand...oooops made another booboo, not only do I need room size, I need closets, pantry, windows, cabinets, appliances, doors, wall height...get the picture?

I'll spare you the rest of the gory details and show you what I finally was able to accomplish. Mind you, it only took about 30+ hours, over 3.5 days and I was only able to complete the first floor. Oh, and pay no attention to that roof line. It made me add it or it wouldn't let me see my 3D version...

Woohoo, Houston we have a floor plan! It's not spot on, but dang close!

After several hours of frustration, I was now feeling pretty good. It was short-lived. lol! Who would have guessed that creating the floor plan was the easy part.

Adding furnishings was frustrating on so many levels. Here is what I managed to do.

The upside, at least I can now see my 1st floor in 3D! I did not figure out how to put in the vaulted ceiling over the livingroom; mostly because it wanted me to put in the 2nd floor. At this point, that wasn't going to happen anytime soon! ha!

So what you won't see is the 2nd floor that has a laundry closet at the top of the stairs between 2bdrms, 2 full baths.

Yikes, why is the furniture so ugly and what is with those color??? It was very cumbersome to place the furniture, some pieces were near impossible, so I gave up.

I decided to just stop trying to make it pretty and explore the "walk through" feature. Bugga, another hurdle to tackle; navigating the camera is a whole new semester all its own!

Birdseye view of my teenie-tiny kitchen. In real life it is white with black granite countertops....


I have glass canisters and these, oddly enough, weren't too bad.

Behind the glass canisters is subway tile backsplash that is suppose to be a pass thru into the dining room that goes the full width; another failed nightmarish attempt!


The only storage I have other than the closet in the 2 bedrooms upstairs, are these 3 closets.....


and a pantry tucked under the stairs


Of course I have 3 garages filled with stuff too. ha! Stairs were another hurdle, but I managed, somehow!


A Sarah Winchester moment; I'm trying to confuse the spirits in the software ha!


Viewpoint from the stairs towards the kitchen & dining room. How ironic that the monitor on the desk is the best looking item from the furnishing library ha!

View from the living room towards the dining room


One fun feature is you can look through the windows and glass doors


If I were able to figure out how to do the landcaping and backdrop, you would have been able to look out from the inside. You can, it's just all...blank.

I can see how computer wizards and computer savvy architects may find this software easy and simple. I'm not computer illiterate nor am I a wiz. For me, this software is not "for dummies" friendly. I see the potential it offers, I would have liked to attain it. I just don't have the motivation (time) this software requires to become proficient enough to enjoy it.

I must add, the fee for architects, interior designers, and landscape designers is worth every penny and more!

In case you are wondering....


you can view the webpage here Better Homes & Garden's Home Designer Suite

If you think you might want to give it a go, I know where you can get a used one...cheap! ;)

This post is linked up with the following fabulously talented hosts:

Cindy @ My Romantic Home ~ Show and Tell Friday

Gina @ The Shabby Chic Cottage ~ Transformation Thrusday

Lori @ Life as Lori ~ Get Your Craft On Thrusday

Steph @ Somewhat Simple ~ Strut Your Stuff Thrusday

Cheers!


Related Posts with Thumbnails