

I am joining in on Metamorphosis Monday, hosted by the fabulous Susan @ Between Naps on the porch.
 When I first started creating broken china mosaics, a.k.a. Pique Assiette, there was very little information available. I had many questions and very few answers or helpful hints to reference. After much trial (and error), I found my own way.
I've created a How To in order to share some helpful hints and instructions that I learned through trial and error. This tutorial will give you an overview of the basics steps.
DISCLAIMER: I am more than aware that art is a very subjective word. I just want to clarify my distinctions. My form is smooth, level, surfaces. I use professional grade grout and adhesives, I nip my own china and create my own focals. It is my intention to create pieces that will last through generations.
If you want to create heirloom pieces, here are a few key things to keep in mind:
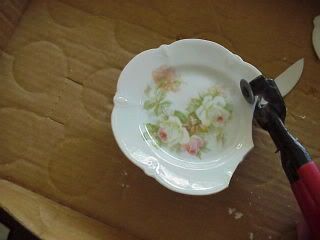
FIRST: DO NOT SMASH YOUR PLATES WITH HAMMERS!! Leave the hammer to the nails. ha!
SECOND: QUALITY MOSAICS REQUIRE TIME. Do not expect to finish a quality piece in a day or even a weekend.
THE BASICS STEPS:
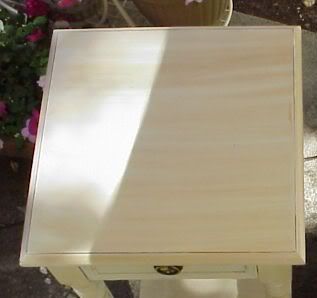
1. Prep Your Mosaic Base ~ this is necessary to give the thinset/mortara something to grab onto. Depending on the surface, you will need to sand and then apply a primer, or just a light sanding is all it will need.
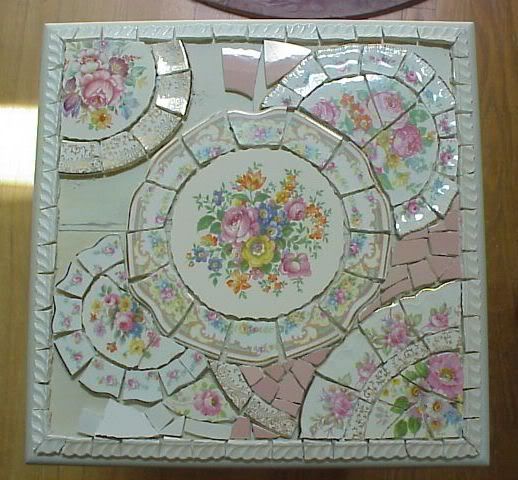
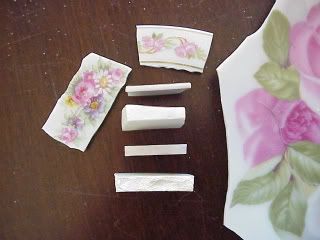
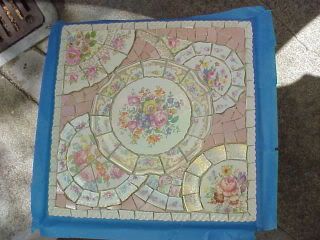
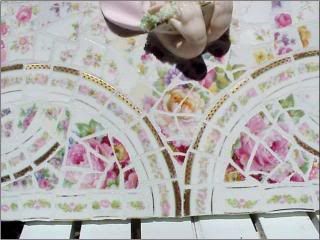
2. Creating/Selecting Mosaic Tiles, Mosaic Focals, Laying Out Design ~ this is where you gather all of your nipped china tiles and focals, determine which method of you will use to create your Mosaic design and layout a design.
You can always nip tiles as you go, but I recommend that the basic china tiles and focals be laid out.
If you are using the direct or my direct press method, it is not necessary to layout all of your fill pieces; unless you are going to use different color fillers and want to be sure you are satisfied with the color combination. This is also your opportunity to see which tiles are the thickest. Do try to avoid extremes in the widths.
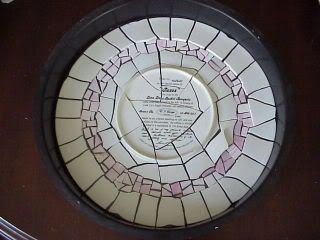
If you are using the indirect method, this is the time you will layout the design including the fill pieces before you transfer them face down into a mold or onto your contact paper or mosaic mount.
3. Adhering Tiles To the Mosaic Base ~ For direct or my direct press methods, you will be using mortar or glue, be sure to always begin with the thickest focal or tiles first. These will be your anchor and sets the height for the rest of the tiles and focals.
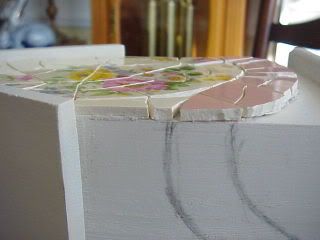
Use glue to set the anchors and thinset/mortar for the focals and tiles that are thinner.
For the indirect methods, this is where you will pour the wet concrete into the mold, or press the prepared section onto the mortared base.
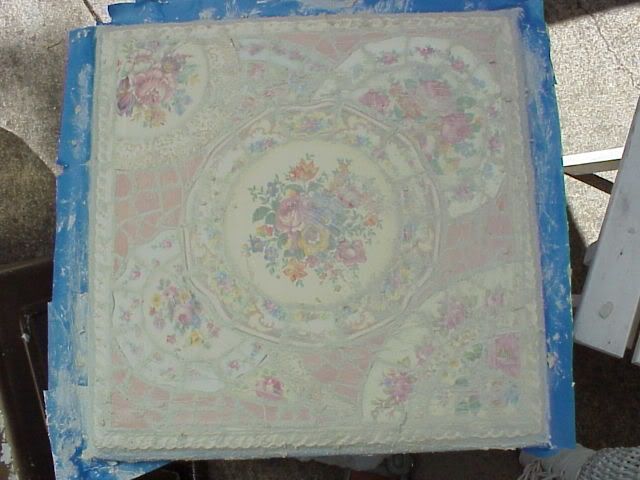
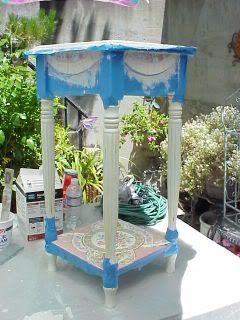
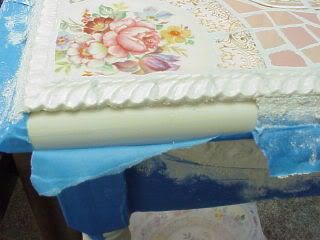
4. Prep for Grouting ~ after the thinset/mortar has set for at least 24 hours, it is time to tape off the base to protect the paint finish from the wet grout.
Painters tape is most effective.

5. Grouting The Mosaic Base
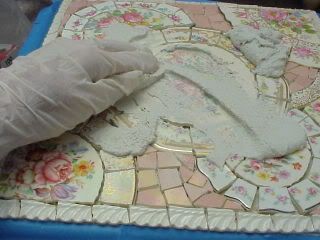
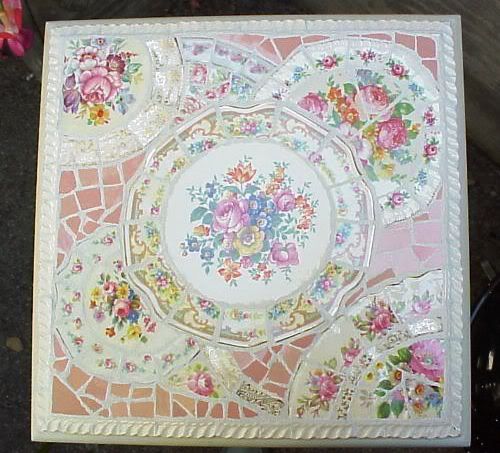
Let dry for 15-20 minutes then clean the film off the tiles and focals.
Remove any painters tape.
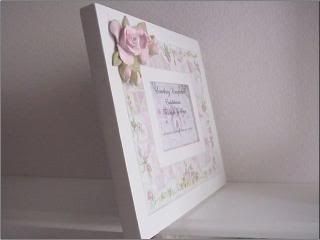
7. Signing Your Mosaic ~ Always sign and date your creations. I use gold or silver paint pens. I usually sign the bottom of the pieces directly under the mosaic design.
There you have it. My 7 basics steps to creating a beautiful mosaic piece that will be cherished for years to come.
For a more detailed step-by-step instructions, feel free to visit my How To page here. There is also a link located under my blog header. Just click the "How To" box.
I always stress that it is best to start small. A lazy susan is inexpensive and ideal. You can also try a small wooden tray. Most are helpful hints. Once you get started, you will quickly develop your own methods and practices. It truly is easier in practice than on paper, or in this case...monitor. ha!
At the very least, you will be more aware of what to look for if you are considering purchasing a mosaic piece. As I've said many times before, your hand will be the best judge of quality in the craftsmanship of the piece.


My vintage china mosaics are available in my Etsy shop here.
Please note, my content is copyright with exclusive rights. Please do not copy my content (text, photographs, illustrations) into any printed form or any form of publication.
If you have any questions, please feel free to email me. I am more than happy to help!
Happy creating!

22 comments:
Tina, your mosaics are simply gorgeous, honey! I wish I could do that but my daughter tells me how much work it is and I'm not into WORK!! Beautiful!!!!!
xoxo,
Connie
Great tutorial. Thank you so much for sharing it. May I link to it from my blog? I think my readers might enjoy seeing a new craft.
Sandy
I love your step by step - I thought you just threw the plate on the floor - LOL ! Your work is
so pretty - I adore rose painted china !
Kammy
Love your mosaics. That is a lot of hard work and you did a great job. Great tutorial. I noticed you joined my blog as a follower and wanted to say thank you. I love comments, too so be sure to say hi sometime...Kim
Tina, thanks for stopping by and leaving a comment.
I LOVE your table and your tutorial is very helpful. Thanks for sharing it. I will have to come back later when I have more time to visit. Your blog is so "shabby chic", I like that!
Hugs,
Cindy
Tina, your mosaics are breathtaking and exquisite. I'm going to bookmark your instructions page. Thanks so much for such a beautiful post. Sincerely, Susan from writingstraightfromtheheart.blogspot.com
Hi Tina!
I am always amazed by your beautiful work! Just lovely!
Hope you are having a wonderful Monday!
Blessings, Mary
Very beautiful. You are very talented!
Wow, Tina! What a great tutorial! I love the way you kept the basic shape of the plates themselves...so attractive and different from other mosaics I have seen! Beautiful job!
Thanks so much for your kind remarks on my blog. About the toile ribbon ...I found it at Hobby Lobby. Have a great week!...Debbie
Tina I am always so in love with your work! Each piece you do is just gorgeous and so unique!! I am still so wanting to get to my big box of broken china and start on something- the wallpaper in the dining room is the first project of the year- was going to start right after New Years but we have had several guests so keep putting it off- I have finally decided guests or no guests I have got to get started!
blessings
mary
Tina:
Love your blog and this tutorial is fab.
Sylvia
Beautiful beautiful work! I am in love!
Toodles
Bon
These are so beautiful, Tina! I don't think I'd attempt something like this on my own, but I do love seeing how they are put together.
Those are amazing!!~ It truly is an art and a talent and you do a great job!!~
You do the most beautiful work. My daughter is going to love your instructions. she has been wanting to do one and will when she gets some time. thanks for sharing.
Thanks for the detailed how-to. Your patience paid off, that is a beautiful piece!
So great to see how that is done...I have admired this type of work forever...so pretty. Thanks for stopping by and come by again soon! Sandra
Thanks for the tutorial...that little table is gorgeous. Thanks for sharing.
Tina, your art is amazing! I have done a few mosaics and like you, initially, it was trial and error. Thank you for the tutorial....perhaps I'll try another mosaic very soon!
Tina...your work is so beautiful! I have a friend who has been taking a class learning to do this. I sent her the link to your post. Your pieces are wonderful!
Hi Tina! Your mosaics are beautiful, original, and so professionally done. Your tutorials and gallery inspire me to create lasting, quality mosaics! thanks and take care!
Tina, your work is gorgeous...I love the table, it has everything I'm attracted to at this time in my life; cheery light colors, flowers, white. My decorating tastes have changed dramatically over the years, but I've not been able to catch up to them as of yet. I come onto sites like yours to dream.
A girl can dream can't she?
Have a wonderful day,
Marianne
Post a Comment