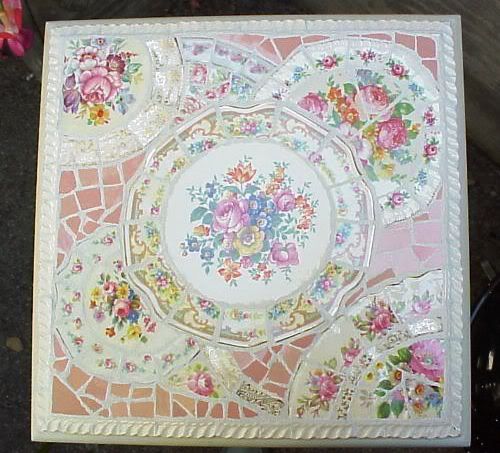
Saturday, May 30, 2009

FOUNTAIN MAKEOVER

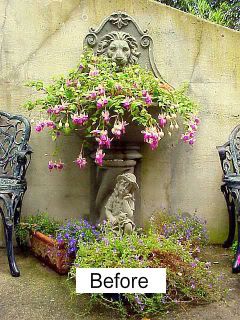
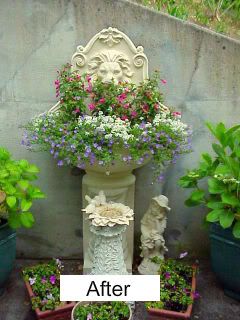
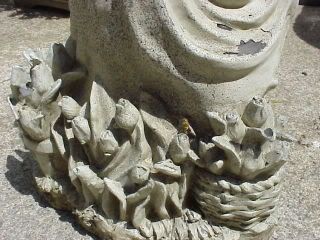
I got this fountain a couple of years ago. It is made of three pieces, base, bowl, and crown. Since I didn’t want an electrical cord running across the terrace, I repurposed it into a beautiful planter.


The original color was limestone. It was spray painted with faux stone paint; (not by me lol) which was made for indoor use. It didn’t fair well and was peeling badly and by this spring it looked just awful.

I wanted to try to restore it to the original limestone color but that didn’t work out. So I gave it a good base using Krylon’s Indoor Outdoor primer in white and finished it with a coat of Rust-oleum spray paint in almond. I did one coat of the primer and two coats of the finish.

Photobucket Photobucket

I let them completely dry in between coats. The almond color was the closest I could find to limestone. My hope is that it will age well.

Photobucket


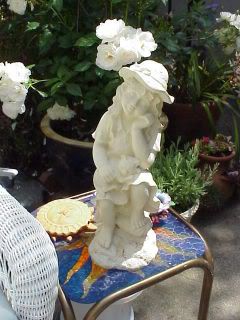
I gave this adorable little girl a makeover at the same time I did the fountain

Photobucket Photobucket

Photobucket Photobucket

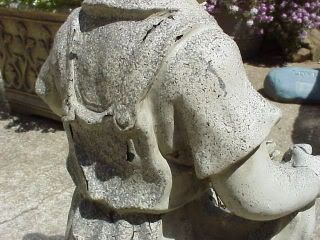
I just recently got this freebie. She’s in bad shape as well. Soon she’ll look as fresh and pretty as her sister.

Enjoy your weekend! ttfn!

Photobucket

Happy Friday!!


First, I want to thank everyone for the wonderful response I've had to my blog! I really enjoyed reading your emails and I very much appreciate your warm welcome and kind compliments! Blowing kiss to each one!!

My second post in my How To's blog is posted. I cover how to create vintage china tiles and focals; there is also some extra stuff that will help you get setup before you start nipping and of course, there are loads of pictures. It's a wee bit long, so I'm thinking I probably should have split it into 3 separate posts...would'a should'a could'a! lol

I keep the link in the left colum of this blog, <----over there, or you can click right here http://mosaictipsandtricks.blogspot.com/

I also keep a link to my photos in flickr. The link is also posted <---over there...and here http://www.flickr.com/photos/enchantedrosestudio/

If any of you out there want to share any pics of your shabby pieces, stories about your mosaic experiences or helpful hints, please feel free to email me. I'd be more than happy to share it with everyone.

Oh! one last thing...you might notice that most of the How To pics show me performing the various tasks with one hand, I needed one to show the the nipper placement and one to take the pic! lol Not easy! There is one photo where both my hands are shown, my brother stopped in and only stayed long enough to take the one photo! He is such a brat lol!

This weekend I'm going to try and finish up a couple of project, the pics are in flickr under "work in progress." Whatcha up to this weekend?

Whatever it may be, I hope you have a lovely, safe, happy weekend!

ttfn!

Photobucket

Thursday, May 28, 2009

With Age Comes Wisdom...No?

Happy Thursday!

I hope the day has been kind to everyone!

The good news first…I’m happy to report I’ve got my blog up and running! Hurrah! It only took an eternity to figure out the html (thank you Google!). It's lookin fairly close to what I envisioned, so I’m STILL tweaking!

Now, the bad news….feeling fairly competent due to my semi-accomplishment, I figured it would be best to create my “How To” blog straight away. Well, the “starter template” that I used for this one was m.i.a, so I picked another and….oh helloooooo the code is entirely different (I switched to several others; all of em coded the same way) Bye-bye competence, back to stupid lol! The older I get, the stupider I get.

I now know exactly how the Scarecrow felt in the Wizard of Oz….”if I only had a brain!” I had a brain once, at least I’m fairly certain I did. What has become of it, I dunno :-p

I realize that some of you are thinking, “why not commission one of the many talented people to do it for her?” That’s a kinda complicated question, which I will answer in short. I’m not cheap; I’m just very….pedantic (a much kinder word than anal, no?) I spent many hours creating my logo, banner, buttons, separators, etc. I own the intellectual property outright.

The first broken china mosaic tip was posted on 5/27. It’s my favorite tip! If you are self-taught, like me, you don’t go to classes, you buy a book. Well the book I purchased only offered the difference between the “direct” and the “indirect” methods; and, my particular favorite…“make sure your tiles are all the same height.” Yes, this was a book about all about how to Mosaic with a chapter in “Pique Assiette”. Lol! So, as in most things, I figured it out for myself, and now I want share my tips with you :)

This first mosaic tip post will stay here for about a week or so, then I will move it over to my “how to” blog. All future tips will be posted directly into my Mosaic Tips and Trick blog.

The link is http://www.mosaictipsandtricks.blogspot.com/.

That’s it for today!

Photobucket

Tuesday, May 26, 2009

Broken China Mosaic - How To Achieve a Level Surface

It is universally acknowledged that mosaic is one art form that people are more inclined to touch than any other. We are drawn to it, we want to run our hands along it's smooth cool surface. There is something calming and sensual about it.

Your hands are the best judge in determining whether it is a well crafted, functional, quality mosaic. It can be very discouraging to to spend hours creating a piece (or spend your hard earned money purchasing a piece) only to watch people grimace as they touch it or quickly pull their hands away from it because of sharp or uneven areas of the surface.

We want to incorporate art and beauty onto a function piece that we use our every day lives. The last thing I want is a surface that scratches or cuts my fingers, or worse still, topples my glass of wine!

Before I address how to level and smooth your mosaic surface, I feel I should briefly mention a couple pointers that both a beginner and novice should always consider before tackling a mosaic project.

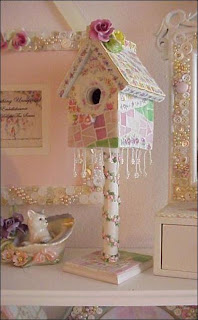
pair of birdhouses I created

First, a bit about your mosaic "base". Contrary to popular belief, a birdhouse, small or large, is NOT the best beginner or novice project. I'm sure many of the novices out there have already that found out. It is far more difficult to mosaic a birdhouse and end up with a piece that has smooth level surfaces and clean edges, similar to heirloom quality pieces. May I suggest that it is best to start with a small table top or tray made of wood or metal.
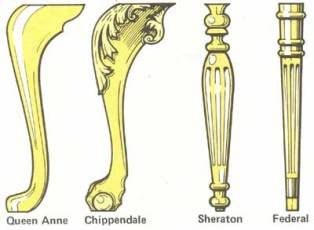
different table legs

When choosing a small table, try to select one that has nice lines and curves; such as queen ann style legs or turned legs. It will add to the overall appearance of your mosaic piece! Check thrift stores and flea markets for incredible deals.

Second, before you even being to adhere your first china tile, be sure you have primed and then painted the piece. It is far more difficult to paint your piece after you have finished laying your mosaic design. Be sure to cover the area of the base you will place the mosaic, do take care not to get any of the top coat in that area.
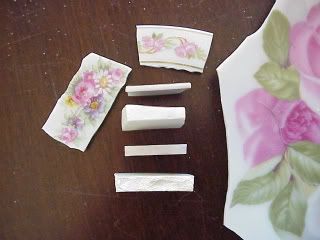

Photobucket

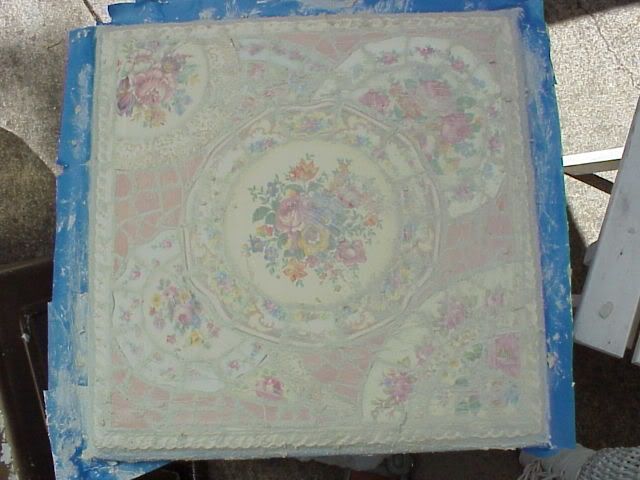
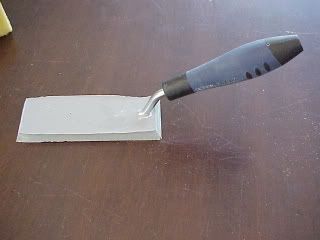
CREATING A LEVEL SURFACE: As you know, not all vintage china pieces are the same thickness, therefore, a press comes in handy. A press is a flat piece of wood or metal. The length and width should be manageable for the size of your base, but does not need to be more than 1/4" thick, just firm enough not to bend or "give".

Now, always place the thickest piece first (the anchor) and level the thinner pieces to it. After you have placed or thickest tile, if the next tile is the least bit thinner, butter a bit of thinset on the back of the thinner tile, then place that buttered tile on the base. Next, hold the press over the thickest (anchor) tile and the freshly placed tile, then gently press down until your "press" rests on the thickest china tile. (Be sure that the anchor is always as near to the center of the press as possible.) To know if you have used the appropriate amount of thinset, after you pressed, some of the thinset will oozed out the bottom of tile, if you don't see any, add a bit more thinset to the piece and press again. With a little practice you will do it with ease in no time at all

I have found that it is best to press one piece at a time, and most importantly, clean off the excess thinset from around the bottom of that tile and off the press. If you don't it may hinder the placement of subsequent tiles. (I use toothpicks to clean off the excess thinset)

Be sure the press size is appropriate for the piece you are working on. I have several different press sizes: 4" x4", and 8" x 4" and my table/count/dresser top base press which is about 18" x 12".

Now, you may think, why not just spread the thinset is a small area and place several tiles down and press them all at once. Been there, done that! The bloody cleanup was a nightmare! The longer thinset stays on the tiles, the harder it becomes. By cleaning the tops of tiles before the thinset underneath the tile has harden you will risk pushing that tile down lower than the other tiles. Also, most thinset do not dry white, so having too much thinset in your grout lines will darken white grout.
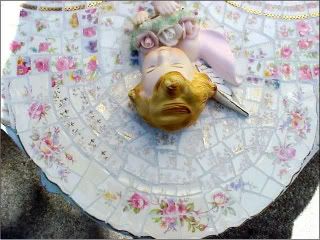
Photobucket

For smoothness: when grouting, make sure to push the grout well into all the spaces between the tiles and the base (such as a the side walls of a tray). Also, when cleaning the grout off the surface, be very careful not to remove the grout lower than the surface of your china tiles. Your fingers will be the best judge in knowing if you have removed too much grout, as you will feel the sharp sides of the tile edges.

A sponge or damp cloth will remove too much grout if you aren't careful. I use a small rubber float. I lightly squeegee some grout off the surface of the mosaic with the edge of the rubber float, then I clean each china tile one by one, doing my best to avoid the grout lines. I use a damp paper towel. I find that a soft cloth is too thick and you inadvertently wipe off too much from the grout lines.

Photobucket

Again, because you are working with varying thicknesses, you should expect some rough spots and some sharp edges. With a little practice you will be able to keep this to a minimum.

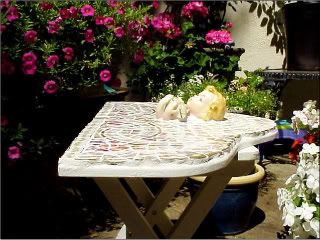
Before smoothing out any sharp corners of the tile, clean the surface of grout residue, then let the piece dry completely. After the piece has dried, using your fingers and palm, lightly feel around the piece for any sharp tile corners. A quick touch of a dremel will smooth it out. I recommend a dremel over a drill as it is easier to lightly grind off that sharp corner without hitting the grout line or taking too much off the tile. If you don't have one and do not wish to invest in one, see if you can borrow one. Otherwise you might try a metal file.

Photobucket

It is more time consuming to apply these methods, but the end results will be well worth it! You will have made a beautiful, quality heirloom piece that you will cherish and proudly display for years to come! You will find yourself running your hands over the smooth and level surface time and again. You will get loads of compliments and when asked "where did you get that beautiful piece?" you will beam with pride as you reply "I made it myself!" ;-)

If you have any questions, feel free to email me. I will be happy to clarify or provide more detail.

For more topics, instructions and helpful hints, a table of contents is provided at the top of the left margin, entitled "How To's" just click on the topic of interest.

Sunday, May 24, 2009

To Wine or not to Whine is that the Question?!


Happy Memorial Day to everyone!

Confession: I have been trying to create a webpage and setup my blog.

As you can see, I've use the default. I really would like to change the background, and a few other things. Unfortunately, I've tried several times and just cannot grasp the fundamentals. I must be getting up on the stupid side of the bed every morning!

I could go on and on about my frustration but what would be the point? (hearing sighs of relief...including my own) At this point I think I'm just gonna exchange my blog of whine to a glass of wine :-)!

It has been foggy here up in San Mateo hills for the past two days. Drive 5 minutes in any direction and....sunshine! Everyone who has stopped by is in short and t-shirts. Lots of Mark Twain has been quoted over the past two days..."the coldest winter...summer in SF". Funny..no? Umm No! I'm thinking maybe my determination to tweak my blog is making my head a bit foggy...perhaps it's the vino :-p

The reason for my desire to blog is to provide another resource for how-to's on broken china mosaic, floral arrangement, container gardening, or mixed media mosaic. It is my intentio to go a wee bit beyond the beginner basics. For example, when you google "broken china mosaic" you get "turn plate face down, cover with towel and hit with hammer.." OMGosh!! NO! NO! and did I say NOOOOOOO?!! No hammers, no towels, yessss "nippers".

To get more info about making vintage china tiles and other pretty gems you will be able to click on my How-To links (as soon as I can get the bloody website up! lol). In the mean time, feel free to email me with any questions you may have.

To get a better idea of what kinds of beauties I'm typing about, go to my photostream and have a look see!

You can visit my photostream on flickr at http://flickr.com/photos/enchantedrosestudio

Ok, I'm off to enjoy a glass of wine and try to dilute my whine! (cheeky grin)

Keep your good friends close and your loved ones even closer ;-)

Wishing all a very happy and very safe Memorial Day!
Photobucket

Sunday, May 17, 2009

HOW TO CREATE BROKEN CHINA MOSAICS (PIQUE ASSIETTE) ~ BASIC STEPS


When I first started creating broken china mosaics, a.k.a. Pique Assiette, there was very little information available.
I've created this How To to share some helpful hints and instructions that I learned through trial and error.

I am more than aware that art is a very subjective word. I just want to clarify my distinctions. My form is smooth, level, surfaces. I use professional grade grout and adhesives, I nip my own china and create my own focals. It is my intention to create pieces that will last through generations.
If you are looking to create heirloom pieces, here are a few key things to keep in mind:
FIRST: DO NOT SMASH YOUR PLATES WITH HAMMERS!! Leave the hammer to the nails.
SECOND: QUALITY MOSAICS REQUIRE TIME. Do not expect to finish a quality piece in a day or even a weekend. Mosaic is similar to knitting, it takes a bit of time for it to come out the way you want. Like knitting, it is possible to put the project down during the design stage (gluing/adhering tiles to the base) and return to it later. Unlike knitting, you can't take it everywhere you go.


THE BASICS STEPS:


1. Prep Your Mosaic Base ~ this is where you need to prime, seal, and paint the base you intend to mosaic. After the finish coat dries, it is time to mosaic.
2. Creating/Selecting Mosaic Tiles, Mosaic Focals, Laying Out Design ~ this is where you gather all of your nipped china tiles and focals, determine which method of you will use to create your Mosaic design and layout a design. You can always nip tiles as you go, but I encourage the basic china tiles and focals be laid out.
If you are using the direct or my direct press method, it is not necessary to layout all of your fill pieces; unless you are going to use different color fillers and want to be sure you are satisfied with the color combination. This is also your opportunity to see which tiles are the thickest. Do try to avoid extremes in the widths.
If you are using the indirect method, this is the time you will layout the design including the fill pieces before you transfer them face down into a mold or onto your contact paper or mosaic mount.
3. Adhering Tiles To the Mosaic Base ~ For direct or my direct press methods, this is whether you are using mortar or glue, be sure to always begin with the thickest focal or tiles first. These will be your anchor and sets the height for the rest of the tiles and focals. Use glue to set the anchors and thinset/mortar for the focals and tiles that are thinner.
For the indirect methods, this is where you will pour the wet concrete into the mold, or press the prepared section onto the mortared base.
4. Prep for Grouting ~ after the thinset/mortar has set for at least 24 hours, it is time to tape off the base to protect the paint finish from the wet grout. Painters tape is most effective.
5. Grouting The Mosaic Base ~ Mix and apply the grout, let dry for 15-20 minutes then clean the film off the tiles and focals. Remove any painters tape. Now is the time to add any gout to gaps or spaces you may have missed. It is also a good time to file or dremel any sharp edges. Sharp edges must be tended to before you seal the piece.
6. Sealing the Mosaic Design ~ After the grout has cured (at lease 48 hours) it is time to thoroughly seal the grout to protect it from stains and moisture. If you haven't filed or dremeled the sharp edges, be sure to do it before sealing.
7. Signing Your Mosaic ~ Always sign and date your creations. I use gold or silver paint pens. I usually sign the bottom of the pieces directly under the mosaic design.
There you have it. My 7 steps to creating a beautiful mosaic piece that will be cherished for years to come.
I've provided the following step-by-step detailed instruction that will guide you through the different process and help you achieve your desired results. Just click on the topic you need.
MOSAIC STYLE ~ PIQUE ASSIETTE DEFINED
MOSAIC METHODS ~ DIRECT, INDIRECT, MY DIRECT PRESS
HOW TO NIP CHINA TILES AND FOCALS
HOW TO CREATE A SMOOTH AND LEVEL MOSAIC SURFACE
SAFETY FIRST ~ AN IMPORTANT FIRST STEP

Please feel free to save my blog as I will be adding more information as often as I can. For now, those are the most important instructions and help hints that will definitely help you get started. You can always find a list of my How To's at the top of the left margin of my blog page.
Please note, my content is copyright with exclusive rights. Please do not copy my content (text, photographs, illustrations) into any printed form or any form of publication.
If you have any questions, please feel free to email me anytime. I am more than happy to help!
Happy creating!


Related Posts with Thumbnails